About a year and a half ago, I bought myself a Netgear GS108 gigabit switch to upgrade my in-apartment “backbone”. Unfortunately, it gave up the ghost last week, starting slowly flashing its lights on and off, and dropped all the PCs in our apartment off the net. I tried a few things, determined that it was, in fact, the switch that was broken, and took it out of service. Fortunately, just before throwing it out, I tried searching for any similar problems, only to find out this particular model is known for this failure.
The Problem: A Netgear GS108 is Broken
Broken, here, means that the switch appears to slowly flash all of its lights, at a rate of maybe once every two seconds. The computers connected to the switch cannot communicate, or at best, are communicating for a fraction of a second, and then report that a cable has been unplugged.
Under the Hood: This symptom indicates failed capacitors on the GS108’s circuit board. For more information, see the comments on Newegg’s product entry (with thanks to the users there who found the problem). If you open your switch up you will see two dark green capacitors with bulging tops (these are broken).
The Solution: Replace two failed capacitors
Supplies
- Broken GS108
- Phillips Screwdriver
- Two replacement 1000μF capacitors, (at least 10V rating)
- Soldering iron
- [Optional] Hookup wire, heatshrink tubing, electrical tape
Procedure
- Begin by unplugging your switch from the wall, removing the power cable from the back, and removing all network cables from the front.
- Open the switch by removing the two small black screws with a Phillips screwdriver.
- Slide the top/back panel off of the switch by pulling it toward the rear.
- Locate the two dark green 1000μF capacitors and verify that the tops are bulging outward, indicating that this is likely your source of failure.
- Remove the circuit board by unscrewing the four silver screws at its corners with a Phillips screwdriver.
- Desolder the two existing capacitors, being careful not to damage nearby components or burn yourself 😉
-
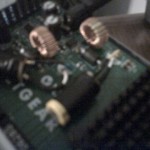
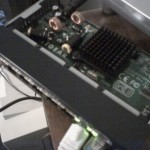
Solder the two new capacitors in place. Below is roughly how this looked after I replaced mine. (Sorry for the terrible photos… my new camera is arriving sometime this week)
For me, the replacement capacitors I was working with were too tall to place vertically, so I ran hookup wire to connect them in place and allow them to lie flat. As a precaution, I used heatshrink tubing on the leads to be sure they were not exposed, and wrapped the sides of the capacitors in electrical tape, as they got a bit nicked by the hacksaw used to harvest them from their previous home…
- Place the circuit board back in the shell, and replace the 4 silver screws.
- Slide the cover back on and secure with the two black screws.
- For safety’s sake, reconnect just the power first to be sure the switch will power on, before connecting your valuable computers & other devices.
- Reconnect your computers and you’re done.
Disclaimer:
This worked well for me, and based on the comments at Newegg, seems to be a common successful fix. BUT, I don’t claim that your broken switch is necessarily plagued by the same problem, nor that this fix will work for you. Also, I am not responsible for the actions you take to fix your switch: be careful with soldering irons, flux, and lead!


